Recently, while trying to implement a few different navigation ideas that a designer had thrown my way, I became frustrated with my weak image editing skills. The design was gradient-heavy, so a traditional approach to navigation markup and styling would require a dozen or so background-image slices to meet the varying colors and height requirements.
After spending a mortifying amount of time creating the images—I’m a programmer by trade, so anything more complicated than MS Paint gives me the willies—I had to take a step back and figure out a better way. What if, after finishing, I needed to tweak the height? Or, God forbid, the color palette? My head was going to explode if I had to open an image editor again, so the Super Easy Blendy Backgrounds technique was born.
The blendy way#section2
Almost all the gradients in the design given to me were blended to white, so I figured that if I created a PNG that was blended from transparent to white, I could use the PNG as a background image and rely on the background-color style to provide the other half of the blend.
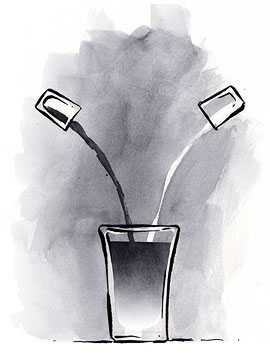
I fired up my trusty image editor and fumbled around until I had created two PNG images: a 100×100 px white-to-transparent blend, and a 100×100 px black-to-transparent blend. (I didn’t need the black for this application, but I wanted to see what it would look like.)

My two transparent-blend images, built in The Gimp
Using those images, I quickly threw together the CSS, and voila! Beautiful blendy backgrounds. (IE6 users, hang on; we’ll get it working for you, we promise.)
Here’s the CSS:
.blue {
  background-color: #2382a1;
}
.green {
  background-color: #4be22d;
}
.pink {
  background-color: #ff009d;
}
.gradwhite {
  background-image: url(grad_white.png);
}
.gradblack {
  background-image: url(grad_black.png);
}
.box {
  border: solid orange 2px;
  float: left;
  height: 100px;
  margin: 1px;
  width: 175px;
}
Here’s the markup:
<div class="box gradwhite blue"></div>
<div class="box gradwhite green"></div>
<div class="box gradwhite pink"></div>
<div class="box gradblack blue"></div>
<div class="box gradblack green"></div>
<div class="box gradblack pink"></div>
In this example and those that follow, we’re using color-based style definitions to make the example easier to understand—but we all know not to use presentation-specific words in our actual class names, right? Right.
Here’s example one, which produces this result:

A PNG gradient used as a background
Hey, it’s not scaling!#section3
After giving myself a congratulatory pat on the back, I tried to scale that div to the size that I wanted. And, as you’ve probably already figured out, the background gradient didn’t scale. Argh! I could force the background image to repeat horizontally or vertically (using repeat-x or repeat-y), but there was no way to scale the background. (See example two if you want to feel the pain.)
CSS3 is going to implement a background-size attribute, but since CSS3 has an ETA of never, that’s no help now. So what do we do? Well, we use something that will scale, like the img element. Instead of using a background to display the PNG blend, we can use an img element, and set the width and the height to 100%.
You can check it out in example three, which produces this result:

Successful scaling—woohoo!
Here’s the new CSS (overwriting what we had before):
.blue {
  background-color: #2382a1;
}
.green {
  background-color: #4be22d;
}
.pink {
  background-color: #ff009d;
}
.gradwhite img, .gradblack img {
  background-color: transparent;
  height: 100%;
  left: 0px;
  position: absolute;
  top: 0px;
  width: 100%;
}
.box2 {
  border: solid orange 2px;
  float: left;
  height: 150px;
  margin: 1px;
  position:relative;
  width: 84px;
}
Here’s the markup:
<div class="box2 gradwhite blue">
  <img src="/grad_white.png"/>
</div>
<div class="box2 gradwhite green">
  <img src="/grad_white.png"/>
</div>
<div class="box2 gradwhite pink">
  <img src="/grad_white.png"/>
</div>
<div class="box2 gradblack blue">
  <img src="/grad_black.png"/></div>
<div class="box2 gradblack green">
  <img src="/grad_black.png"/>
</div>
<div class="box2 gradblack pink">
  <img src="/grad_black.png"/>
</div>
The image is showing up on top of my text! What gives?#section4
Now that we have these sweet blendy backgrounds, let’s try to put some text in them. The first thing we need to do is make the boxes scale when the user resizes the text. We’ll do that by dropping the height declaration and then adding a conditional comment as a favor to IE7, which apparently looks to the parent element for a height if none is specified. You can read more about conditional comments at Quirksmode.
Note: In real life, you’d probably want to simply include a CSS file that targets a compliant browser like Firefox and then include two more (using conditional comments that target IE6 and IE7). But for now, here’s that comment:
<!--[if IE 7]>
<style type="text/css">.box {
  border: solid red 2px;
  height:2.5em;
}
</style>
<![endif]-->
Text showing up behind the PNG gradient
You can follow the attempt in progress in example four. The absolutely positioned image is showing up in front of the text. To correct that, we use the universal selector to select any descendents of .gradwhite, position them relatively (greater specificity could, of course, override this as necessary), and give them a z-index of 1. Giving the img a z-index of 0 then keeps it from popping to the surface. While we’re at it, we’ll add a little style to the paragraphs to set them off.

Text correctly appearing in front of the PNG gradient
Example five does the trick. Here’re the new and updated rules:
.gradwhite img, .gradblack img {
  height: 100%;
  left: 0px;
  position: absolute;
  top: 0px;
  width: 100%;
  z-index:0;
}
.gradwhite * {
  position: relative;
  z-index: 1;
}
.gradwhite p {
  margin: 0px;
  padding: 3px;
}
.box3 {
  border: solid orange 2px;
  float: left;
  margin: 1px;
  padding: 5px;
  position:relative;
  width: 256px;
}
And here’s the markup:
<div class="box3 gradwhite pink">
  <img src="/grad_white.png"/>
  <p>This text is in front of the image.</p>
</div>
Do you realize none of this works in IE6?#section5
We all know that IE6 and prior versions don’t support PNG transparencies. And since IE7 won’t have the majority market share for awhile, you’re probably thinking that this is a great exercise in something your boss will never let you use, right? Well, IE has this great little thing called the AlphaImageLoader filter, which is explained in ALA’s “Cross-Browser Variable Opacity with PNG: A Real Solution.” The pertinent part is that you can load a PNG image and set the filter to “scale,” thus eliminating (for IE) the need for the workarounds we used for Firefox.
So how do we make this work in both IE and Firefox at the same time? Well, we can target our styles for Firefox, and then use the star-HTML hack to override them for IE6. I’m using the star-CSS hack here more in the interest of clarity than anything else; I think it helps to see everything together, plus it’s easier to cut and paste. When I use this technique in a production environment, I prefer to use conditional comments to target browsers. After all, hacks are hacks, and they aren’t guaranteed to work in perpetuity.

Technique working in IE6
Example six puts it all together. Here’s the CSS to add. (Line wraps marked » —Ed.)
.gradwhite {
  filter: progid:DXImageTransform.Microsoft. »
AlphaImageLoader(src='grad_white.png', »
sizingMethod='scale');
}
* html .gradwhite img {
  display:none;
}
And here’s the markup. (Don’t stare too long at the ugly inline styles—they’ll be gone in just a second.)
<div class="box gradwhite pink">
    <p>Wow, maybe this will actually work!
    </p>
</div>
Wrapping everything up#section6
Finally, we’ll add one more star-HTML rule (position:static applied to the box class) to deal with a nasty IE6 bug that keeps links from working with AlphaImageLoader in certain circumstances.
Example seven shows our final cross-browser Super-Easy Blendy backgrounds, which look like this:

Super-easy blendys in all their glory
Here’s the final CSS in its entirety. (Line wraps marked » —Ed.)
<style type="text/css">.grad img {
  height: 100%;
  left: 0px;
  position: absolute;
  top: 0px;
  width: 100%;
  z-index: 0;
}
.box {
  border: solid orange 2px;
  float: left;
  margin: 1px;
  position: relative;
  width: 165px;
  padding: 5px;
}
.box * {
  margin: 0px;
  position: relative;
  z-index: 1;
}
* html .grad {
  filter: progid:DXImageTransform.Microsoft.AlphaImage »
Loader (src='grad_white.png', sizingMethod='scale');
}
* html .grad img {
  display: none;
}
* html .box {
    position:static;
}
.blue {
  background-color: #2382a1;
}
.green {
  background-color: #4be22d;
}
.pink {
  background-color: #ff009d;
}
</style><!--[if IE 7]>
<style type="text/css">
.box {
  border: solid red 2px;
  height:2.5em;
}
</style>
<![endif]-->
The final markup:
<div class="box grad blue">
  <img src="grad_white.png" alt="blur gradient box" />
  <p><a href="#">Ooo, linked text</a>!</p></div>
<div class="box grad pink">
  <img src="grad_white.png" alt="pink gradient box" />
  <p><a href="#">Ooo, linked text!
</div>
<div class="box grad green">
  <img src="grad_white.png" alt="green gradient box" />
  <p><a href="#">Ooo, linked text</a>!</p>
</div>
That’s it! In Part Two of this two-part series, I’ll explain how to work this technique into visually sophisticated layouts.
Is it really worth it? Is it really worth all the haggle and all that messy markup/CSS-code to save in a few bytes of image-files? I think not. I’d rather preffer ten image-files weighing a few kilobytes rather than having all that extra code to mess up my stylesheet and markup, especially on a large webpage with a complex layout.
You could do it server side (or probably with JS), though, but that again would leave far more work than just making it as images in the first place.
Nice method for experimenting, understanding and learning, but I dont think i will be using it a lot.
Learning CSS with this type of good article and demo is fun… great job!!
Thanks Matthew O’Neill.
Why does this break in IE 6 when I remove the float:left from the .box? (It will still work in Firefox.)
nice article, and good concept to apply.
The part to make PNG work in IE using AlphaImageloader seems to be misplaced though.
Why would one require a filter to do other filters’ job, that too using external images?
please look up http://msdn.microsoft.com/workshop/author/filter/reference/filters/gradient.asp
My idea will be to get gradients in IE without using any imges, keep the PNG gradeient of FF and other browsers though.
Opera doesn’t like padding on the containing div–it seems to still apply the padding to the absolutely positioned image, but on the right side of the div. Removing the padding or placing it on another element (such as a nested span) apparently fixes this.
An example: http://prisoner34.com/blendy/
Sorry, but this time it wasn’t 🙁 I frequently find ALA articles interesting, even when I can’t find them an inmediate use. But not this time.
When I became aware of what a PNG can do I tried this trick, but found most of the problems already mentioned in the article and the comments. But the worst, for me, is that it isn’t enough to mix a color with white or black to make it look good!
Considering that any 256×256 2-color PNG linear gradient is about 860 bytes long and that I can create it with 7 mouse clicks and a filename, I doubt I’ll bother with the second part of the article.
… some Browsers don’t support the transparency of PNGs?
I can see maybe, maybe using this for mock-ups, but with today’s graphic tools, creating high-quality gradients is easy.
I really suggest avoiding this technique and making backgrounds with what they are intended: the background property. At least the background property is cross-platform and has very few issues with various layout techniques (floats, absolute positions, etc) where this method can easily break down.
I applaud the creativity, but it has a major down side. The img elements in the markup are not really content, but are shown as such by web clients that aren’t css aware or that have css turned off.
We needed scalable background images for a project several months ago and went with this technique. Our web site navigation now looks horrible in non-css browsers, like cell phones, lynx, or even ie/win in accessibility mode. it also probably makes users of screen readers unhappy.
Its a neat hack, but not a good production solution.
It uses a CSS hack.
I never have used hacks in any of my css. Never will.
I will see if I can come up with the same technique and no hacks.
I mean, it works – yeah. And it’s a pretty good idea. Very original thought process. It just seems like so much extra work to achieve something you can do with a couple of seconds in photoshop with the gradient tool.
Great idea, really. Just seems a bit excessive to make a gradient.
I recently rediscovered the Power of PNG 24bit transparencies after running some wonderful tests in FireFox and went ga-ga over it. Of course I repeated the tests in IE 6 and wanted to cry… support for this is non existent without going above and beyond compliant mark up for CSS, I wonder how long IE7 will take to hit the masses hard with Windows Vista out. Then we can go Nuts!
I must say that this technique is really great. It also inspired me to create blendy tabs, to use for site navigation. Take a look at:
http://www.boriskuzmic.com/index.php?p=projects_css_js